
Trimble SketchUp Pro can generate 3D terrain models using elevation data from many regions around the world. Sometimes the resulting geometry needs cleanup and refinement for better flexibility. Below as a summary of how an application called Side Effects Houdini (a beloved procedural powerhouse of the visual effects and game industries) can help.
Ingredients:
- Trimble SketchUp Pro 19.1 (With internet access for geospatial data)
- Side Effects Houdini 17.5 (Indie used here, but the free Apprentice might also be sufficient.)
- Google Earth Pro for higher-resolution aerial images (texture mapping is beyond the scope of this particular discussion.)
Summary:
- Obtain terrain geometry using SketchUp.
- Import SketchUp’s terrain data into Houdini.
- Clean and and refine terrain using Houdini’s virtually limitless toolset.
- Import the refined terrain back into SketchUp.
Get Terrain
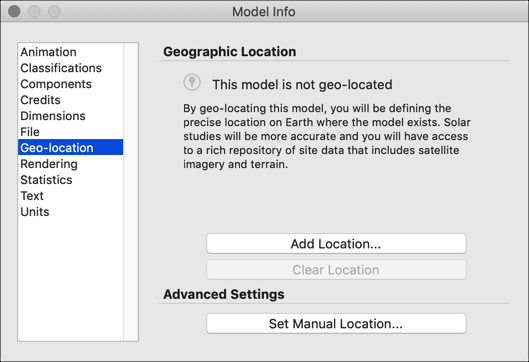
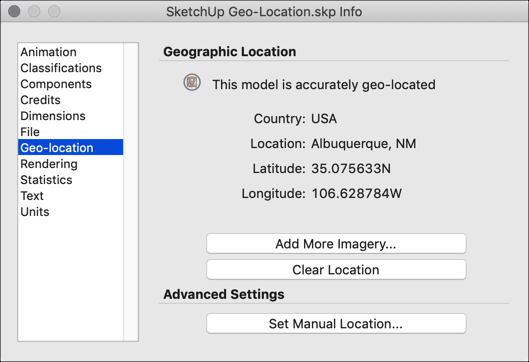
First, fetch some terrain data, which in this case originates from SketchUp’s Geographic Location network service. (This appears to require a paid version of SketchUp Pro, as Trimble no longer offers a standalone version like SketchUp Make.)
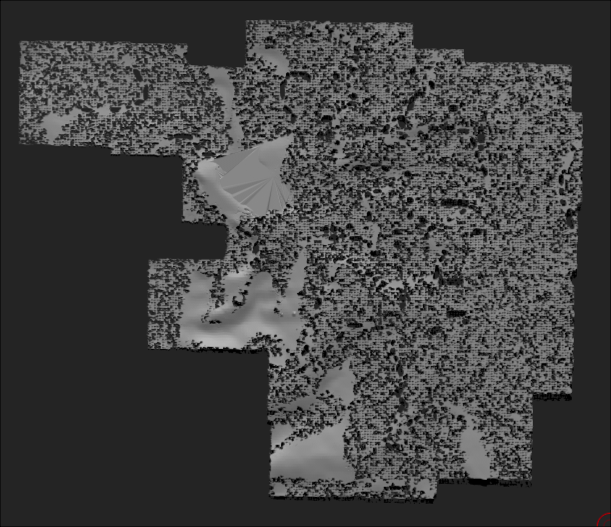
Pressing the “Add More Imagery…” repeatedly might lead to a more data density than necessary. Each blue tile is a discrete object with no knowledge of its neighbors. Redundancy abounds.
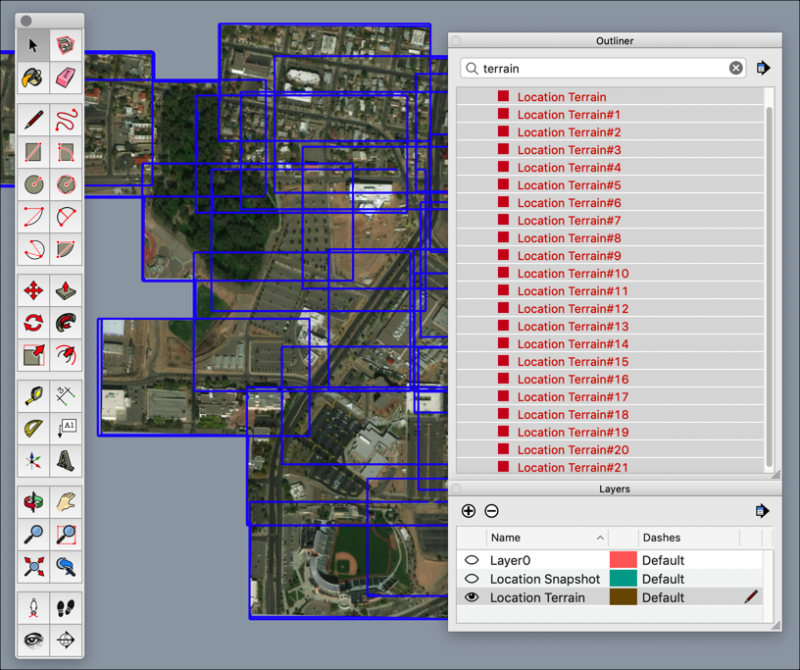
These tiles could benefit from some reorganization. To begin, unlock each of the “Location Terrain” geometry objects, then select them. (Note: the 3D layer is called “Location Terrain,” not “Location Snapshot,” which just contains raster aerial images. And low resolution, at that.)
Next, choose File > Export > 3D Model… and specify a Wavefront geometry (obj) file format.
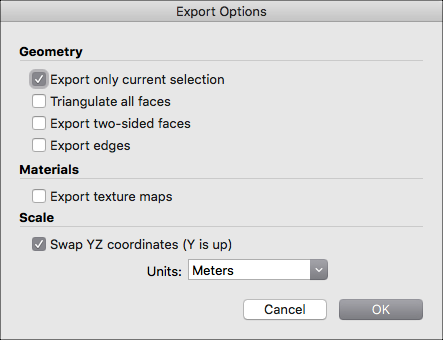
In the Export Options dialog box, enable “Swap YZ coordinates” so that the Y axis points upward. Stick with meters as the units format. Enabling texture maps seems to be of limited use, as each tile gets its own jpeg file. (Houdini’s compositing system (COPs) could probably handle a procedure to recombine the individual images.)
As an aside, routing the .obj file through Pixologic ZBrush’s DynaMesh system produced something resembling the aftermath of a termite infestation.
Clean Terrain
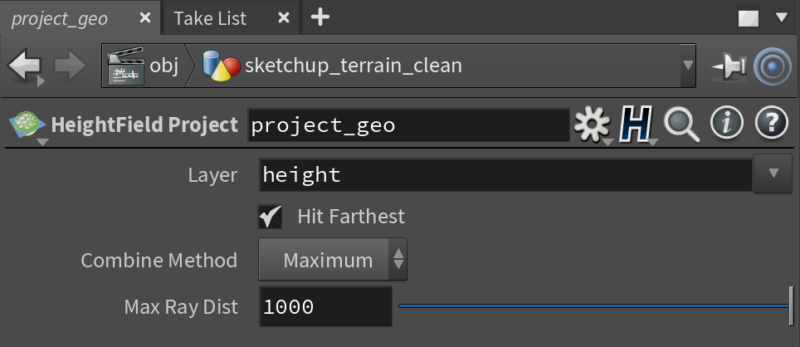
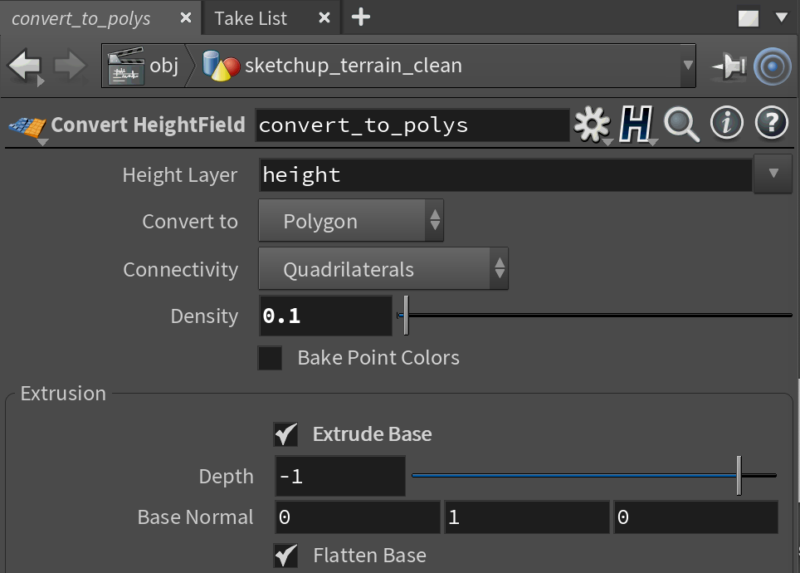
Below is a sample Houdini node network for importing the SketchUp terrain, cleaning it up, then exporting a refined version. This method harnesses Houdini’s heightfield model, a system of portraying detailed terrains using surface-like 2D volumes.
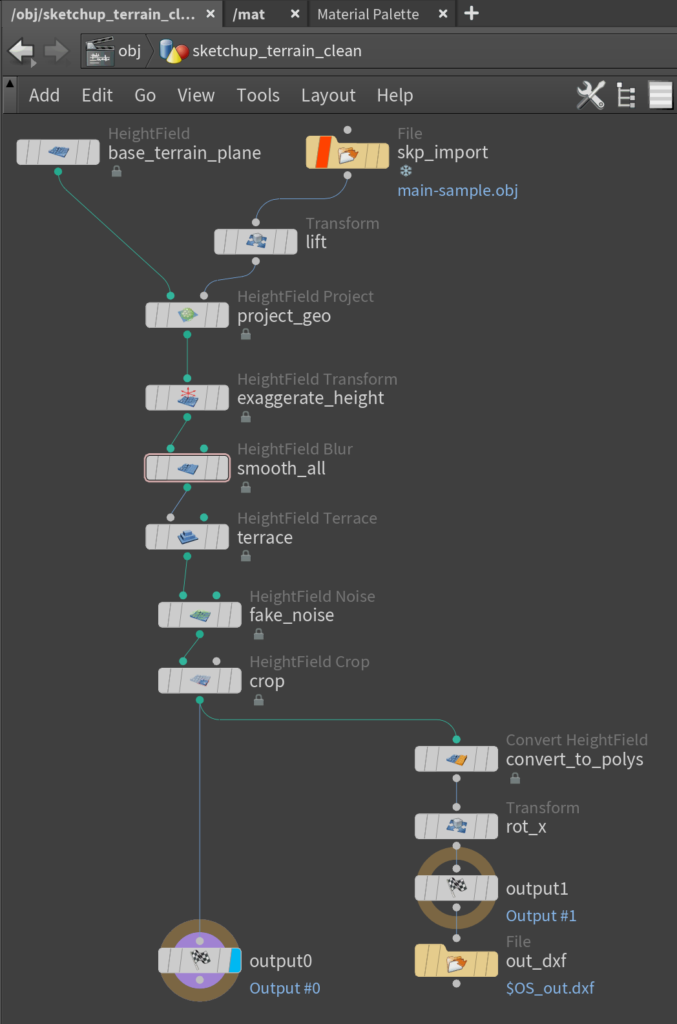
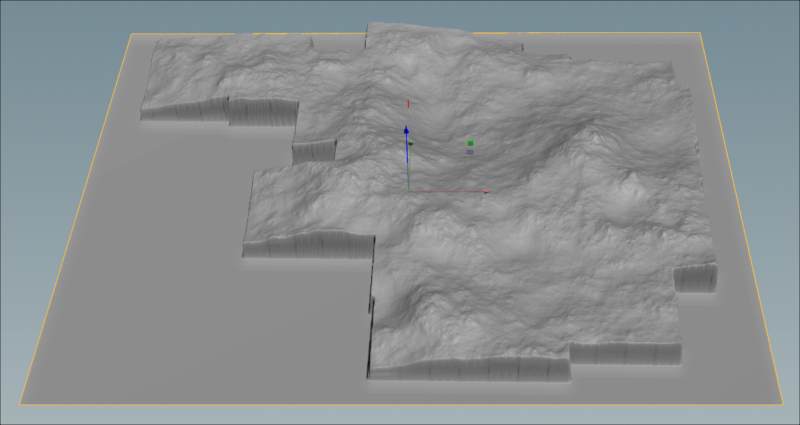
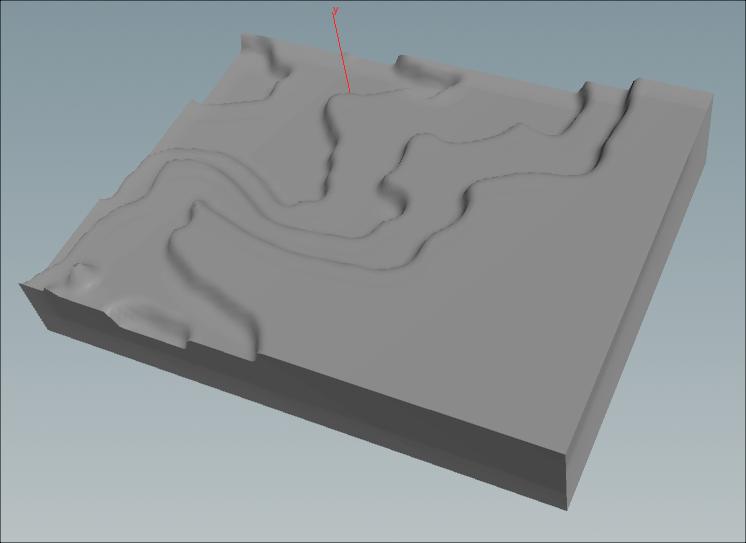
Houdini’s heightfield operators can emphasize major contours for illustrative purposes.
The final nodes in this network convert the terrain to polygons and saves the geometry as an AutoCAD Drawing Interchange Format file (dxf).
Back to SketchUp
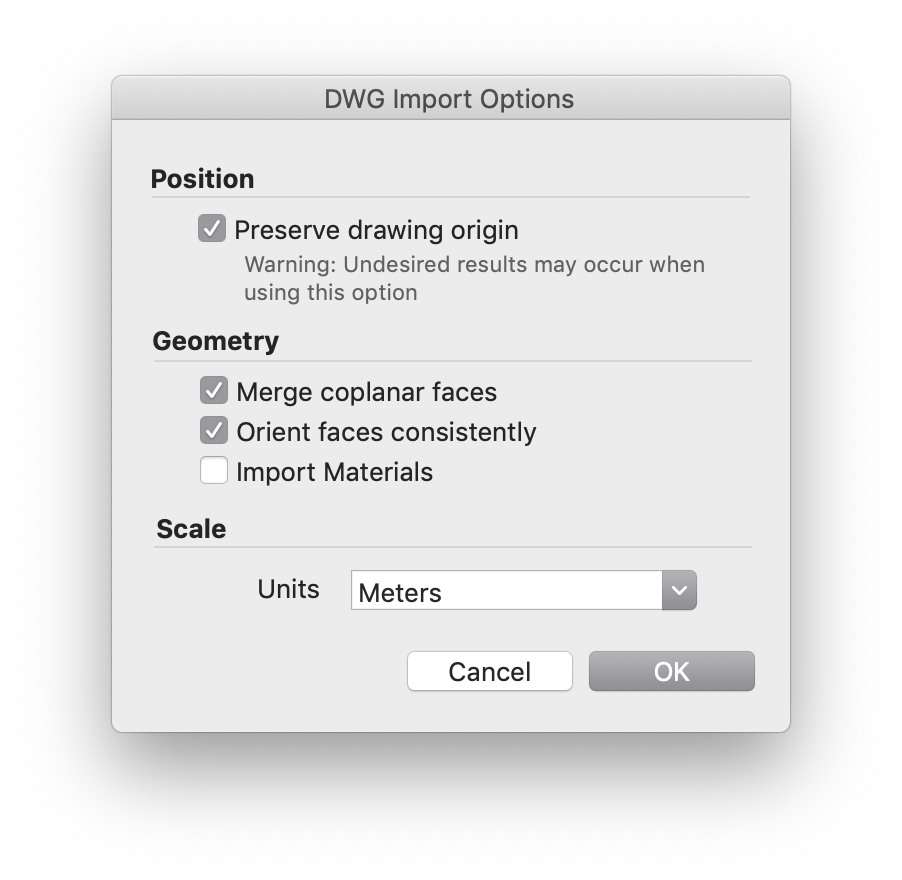
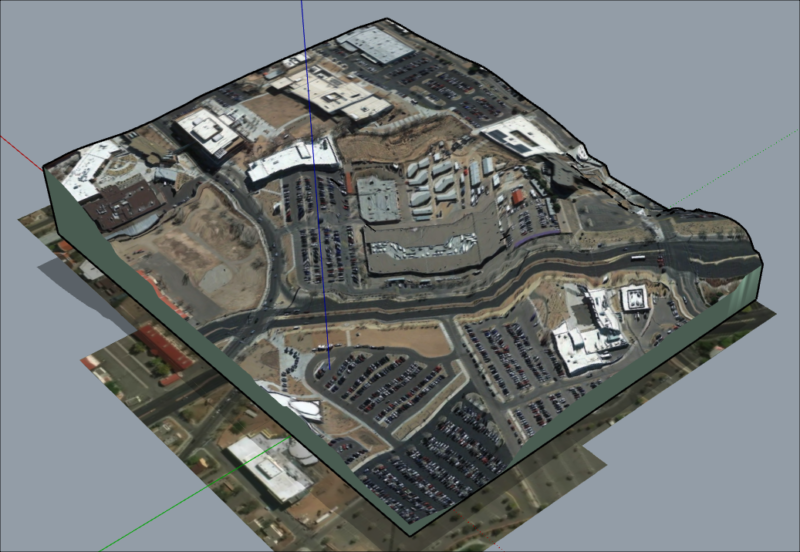
Next, import the newly-minted dxf back into SketchUp. Enable drawing origin preservation to ensure that the freshened terrain slab remains positioned exactly where it should.
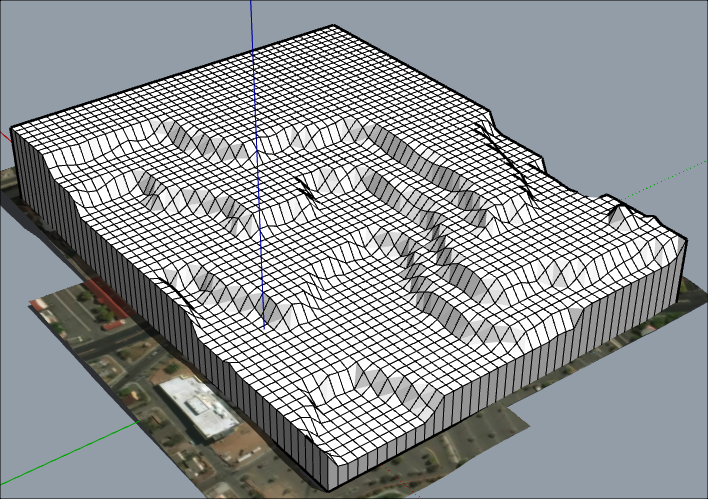
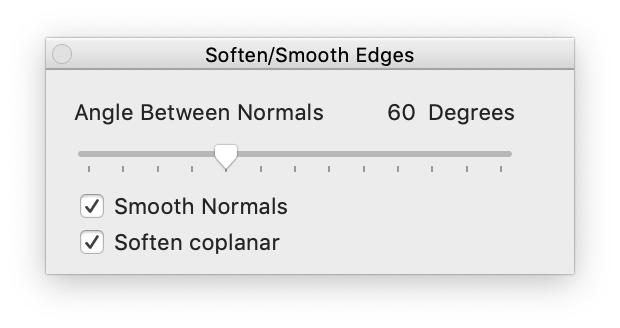
Finally, enable edge smoothing in SketchUp to hide the model’s gridlines and make the terrain look more natural.
Optionally, project a higher-quality aerial texture onto the fresh terrain. Google Earth Pro can be a good source for such imagery. (SketchUp’s finicky process for texture mapping is worthy of its own discussion.)
Summary:
SketchUp > terrain > obj > Houdini > heightfield > dxf > SketchUp > heightfield > dxf > SketchUp
This isn’t necessarily a practical or advisable solution to cleaning up a slab of virtual terrain. But it turned out to be a fairly quick and repeatable approach in this case.